Audio Cutter: Remove a Section From Audio
To remove a section from the middle of a recording, use the Audio Cutter, a free audio cutter that runs in your browser, in two passes. First export everything before the unwanted part, then everything after it, and stitch the two halves back together in the Audio Joiner. For one cut in a short file, expect about five minutes, most of it spent listening to the seam. You don't need an account, and your audio never leaves your device.
This is the reverse of pulling a clip out. Here you throw the middle away and keep both sides: the cough in an interview answer, the swear in a voiceover, the stretch of a lecture where the mic got knocked. The cutter keeps one region per export and has no "delete selection" button, so the job is split, then join.
What you'll need
- The recording as a file on your device: MP3, WAV, M4A or anything else your browser can decode.
- The rough time of the part you want gone. A transcript with timestamps helps on long files.
- Headphones. A click at the seam or a mismatched breath is easy to miss on laptop speakers.
- A backup of the original. The tools never change your source file, but keep a copy until you've heard the finished edit.
How to cut a section out with the audio cutter
Pass 1: export the part before the cut
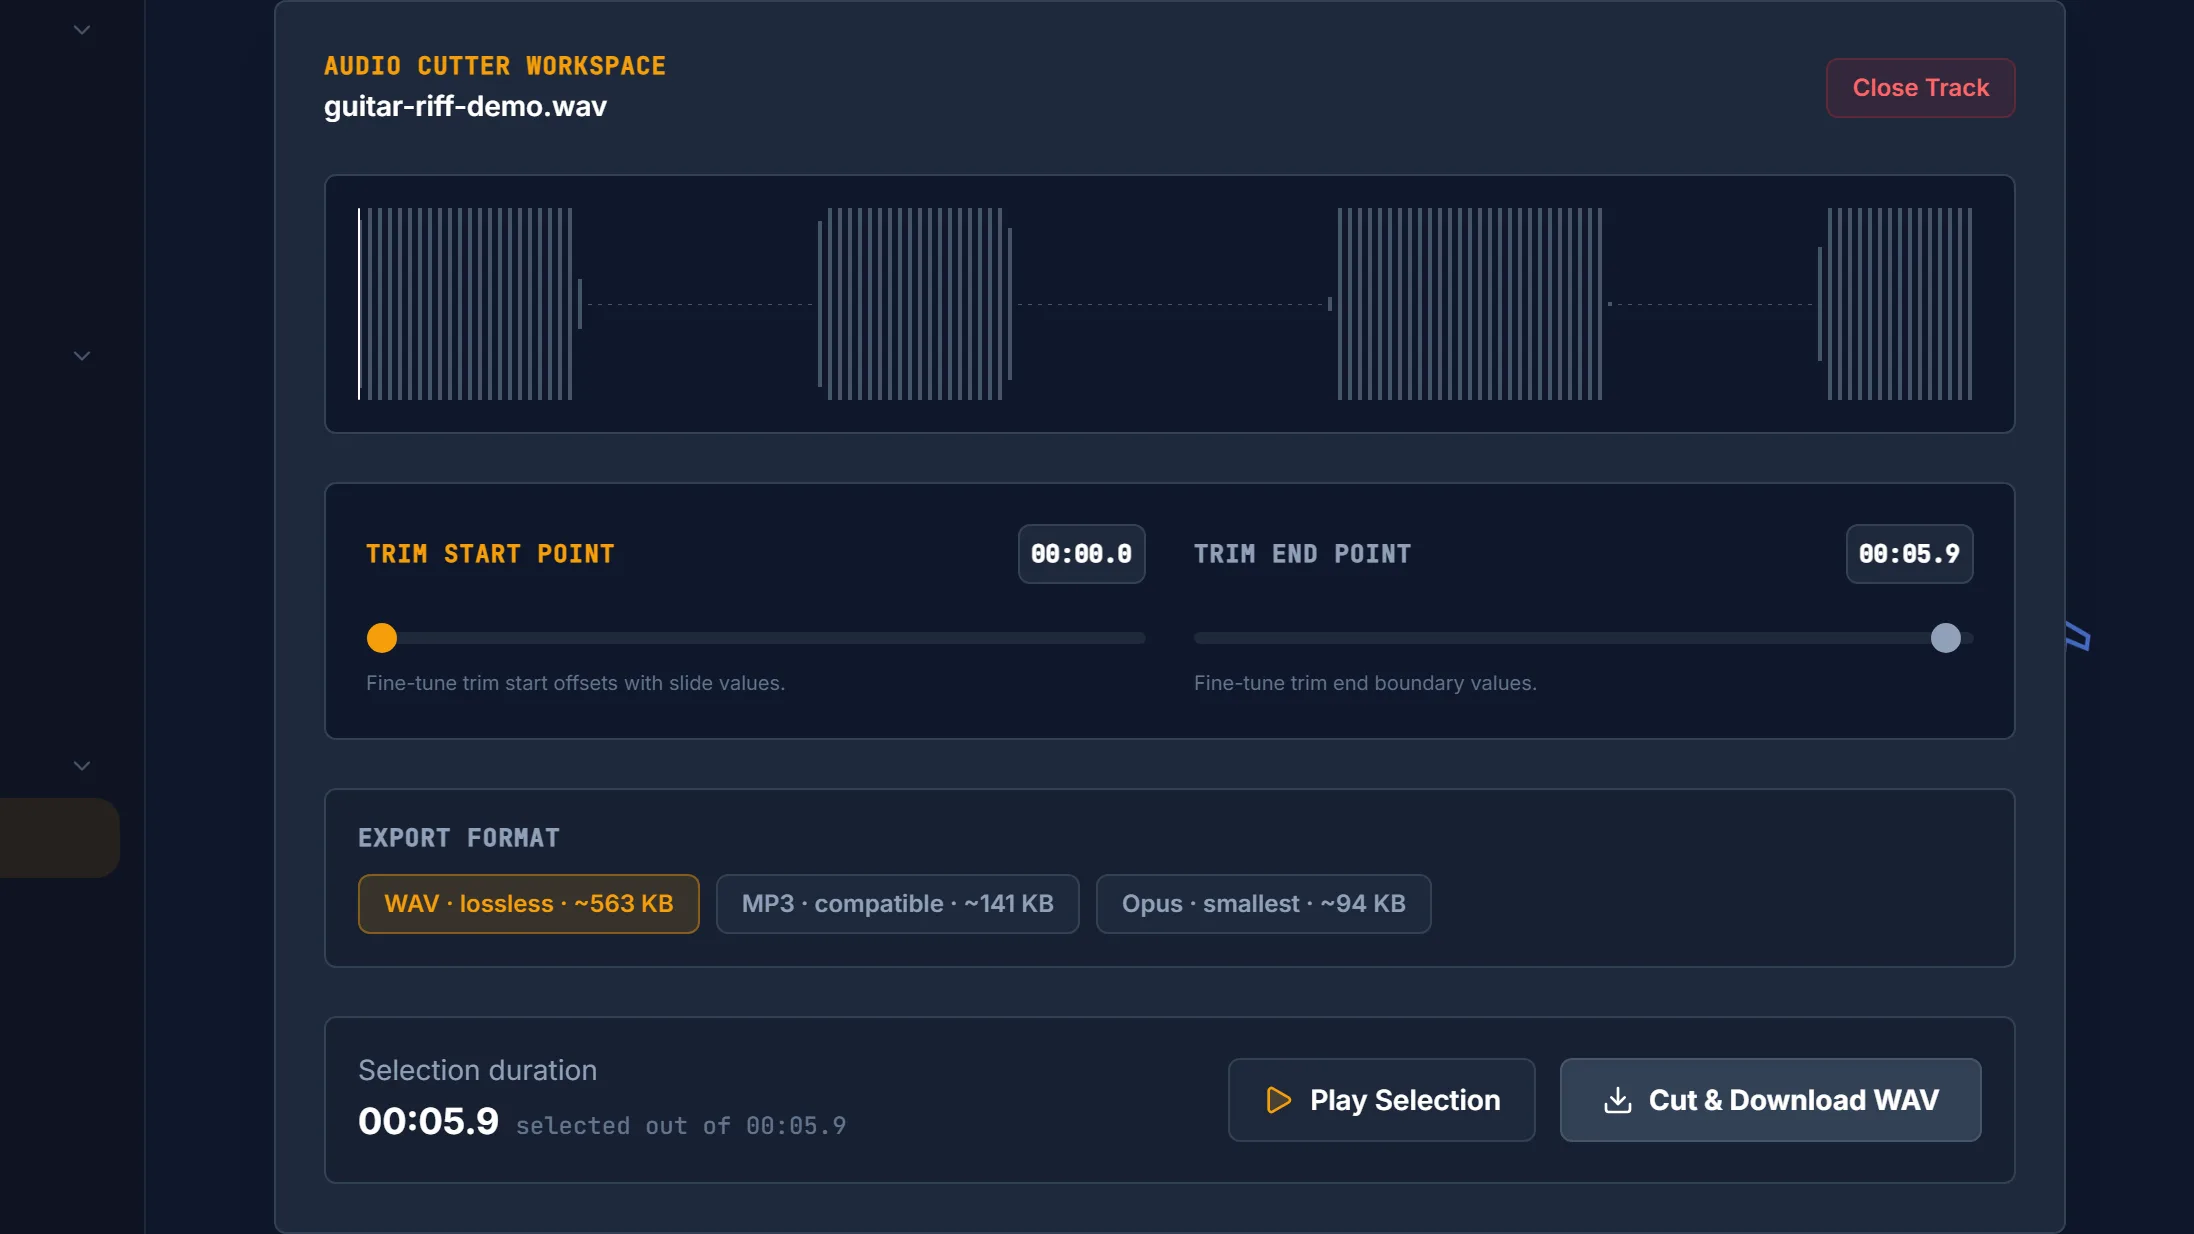
- Open the Audio Cutter and drop your file in. It decodes in your browser and shows the waveform. When the file first loads, the selection covers the whole recording.
- Leave the Trim Start point at the beginning. Part A starts at 0:00.0.
- Drag the Trim End point to just before the unwanted part. The readout shows minutes, seconds and tenths. For fine placement, click the slider and use the arrow keys, which move it 0.1 seconds per press.
- Check the edge by ear. Click Play Selection, then click the waveform a few seconds before your end point to jump there. Playback stops on its own at the end point, so you hear exactly where part A finishes.
- Set the export format to WAV and click Cut & Download WAV. The file saves as
cut_plus your original file name. Rename it now, to something likepart-a.wav.
Pass 2: export the part after the cut
- Keep the same file open. After a download the trim points stay where you left them, so there's nothing to reload.
- Drag the Trim End point all the way to the end first. The two points always stay at least 0.1 seconds apart and the start can't pass the end, so clear the way before you move the start.
- Drag the Trim Start point to just after the unwanted part. Use Play Selection to confirm that part B begins where you want it, with no tail of the cough or the word you removed.
- Export WAV again and rename it
part-b.wav. It also arrives with thecut_name, so your browser may add a number or ask about overwriting the first one.
Join the two halves
- Open the Audio Joiner and add both parts. Drop them in, or use Add track files. Check that part A is listed first; the up and down arrows change the order.
- Set Crossfade between tracks. Off joins the two parts end to end. Any other setting, from 0.5 to 12 seconds, overlaps them. The next section explains which to choose.
- Pick your final format and click Join & Download Audio. This is the one place to choose MP3 if you need a smaller file. Both halves come from the same recording, so their sample rate and channels already match, and the joiner would conform them anyway.
Why export WAV in between
Cutting copies the exact samples between your two points. Exported as WAV, those samples are written as 16-bit PCM without re-compression, so neither half loses anything. Export each half as MP3 and the join as MP3 again, and the audio goes through lossy encoding twice. Keep the intermediate files in WAV and make one lossy encode at the end, if you need one at all. How to Cut Audio Without Losing Quality covers generation loss in more detail.
If you came looking for an mp3 cutter online or an mp3 audio trimmer, the workflow is identical for an MP3 source. Only the last export needs to be MP3.
Making the seam inaudible
Where you cut matters more than any setting.
Speech: cut in the pauses
Put both cut points inside natural pauses, ideally a breath or the gap between sentences, never mid-word. With crossfade Off, the silence that ends part A and the silence that starts part B sit back to back, so their lengths add up. Cut both tight and the speaker sounds rushed; leave a full pause on both sides and you get an unnatural gap. Aim for one normal-length pause split across the two.
If you hear a click at the join, the waveform wasn't near zero at one of the cut points. Nudge that point a tenth of a second into the quietest part of the pause and export again. A 0.5-second crossfade also hides most clicks and smooths a change in room tone, with one condition: the last half second of part A plays under the first half second of part B. Both sides need at least that much pause, or words will overlap. The result also runs 0.5 seconds shorter.
Room tone is the other giveaway. If the air conditioning switched on during the section you removed, the background will jump at the seam. The crossfade softens that jump. It can't remove it.
Music: cut on the beat and try Off first
For a song or a DJ mix, place both cuts on beat boundaries, ideally the first beat of a bar, so that what you remove is a whole number of bars. Then join with crossfade Off. If the cuts line up, the rhythm carries straight through.
Be careful with crossfades on music. Overlapping two passages whose beats don't line up gives you doubled drum hits and a smeared groove for the length of the overlap. Only reach for a crossfade when both sides of the cut hold a sustained sound and no strong rhythm.
Listen across the seam
Play the joined file from about ten seconds before the edit to ten seconds after. Listen once without watching the screen. If you can't hear the cut, you're done.
Troubleshooting
The seam still clicks with crossfade Off. Give each half a tiny fade with Audio Fade: a 0.1-second fade-out at the end of part A and a 0.1-second fade-in at the start of part B, exported as WAV. Then join again. How to Fade Audio In and Out walks through the tool.
Words overlap or a syllable doubles. The crossfade is longer than the pause on one side of the cut. Turn it down to 0.5 seconds or Off, or recut with more pause kept on each side.
The parts join in the wrong order. Order follows the list in the joiner. Move part A to the top with the arrows before you export.
You have dozens of gaps, not one. Cutting by hand doesn't scale to that. The Silence Remover finds and shortens every pause in one pass; see How to Remove Silence From Audio.
Related tasks
To keep one passage and drop everything around it, follow Audio Cutter: Extract a Section From a Recording. For a podcast full of hesitations rather than one bad moment, How to Trim Dead Air From a Podcast is the faster route. More step-by-step tutorials are in the how-to guides.
Frequently asked questions
Can I delete a section from the middle of an audio file without other software? Yes. In Vocal Cut you export the part before the unwanted section and the part after it with the Audio Cutter, then combine the two files in the Audio Joiner. Both tools run in your browser, so there's nothing to install and your audio never leaves your device. The cutter has no single delete-selection button, which is why it takes two exports.
Will removing a section reduce the audio quality? Not if you export the two intermediate parts as WAV. Cutting copies the original samples, and WAV writes them without re-compression, so nothing is lost before the join. Choose MP3 only for the final joined file if you need a smaller size. Exporting each part as MP3 and the join as MP3 again adds an extra round of lossy encoding.
Why is there a click where I joined the two parts? A click means the waveform wasn't near zero at one of the cut points, so the join creates a sudden jump. Move the cut a tenth of a second into a quieter spot, such as a breath or a pause, and export again. For speech, a 0.5-second crossfade in the Audio Joiner usually hides it, as long as there is a pause on both sides.
Should I use a crossfade when removing part of a song? Usually not at first. Cut both points on beat boundaries, ideally the start of a bar, and join with crossfade Off so the rhythm continues without a break. A crossfade over passages whose beats don't line up produces doubled hits and a smeared groove. Reserve crossfades for sustained, beatless sections, or for speech and ambience.
How do I remove many pauses or silences from a recording at once? Removing sections by hand works for one or two cuts. For a recording with many pauses, such as a podcast or lecture, use a silence remover instead. Vocal Cut's Silence Remover detects quiet gaps across the whole file and shortens them in one pass, so you don't have to split and rejoin the recording at every pause.